
Introduction
Hi, honey! Sorry I screwed up your machine. It's all my fault. I should have know that the upgrade wouldn't work after all the customization I'd put on the old system. You totally get Linux, though, so I know that you can follow these instructions to get your beautiful system back. The bad news is that I'm going to use a couple hours of your timie to unscrew what I screwed up. I know you'll still love me, anyway.What are you going to do?
Let's talk about the steps before we start, OK?
- Back up your data (just in case)
- Get rid of your strange application preferences
- Download Ubuntu 10.04 and write it to a blank CD or USB key.
- Install Ubuntu 10.04 without writing over your personal files (be really careful here!)
- Install Ubuntu Tweak to help you with getting all your old applications back
- Add the extra applications you need
Back up your data (just in case)

I have lots of disk drives in the old media server that are as big as your desktop's hard disk. You can use any of those by opening the case and pulling one out. The ones with the red cables are better and newer than the ones with the wide, gray cables. Take the cable out with the drive, and look to see how it's connected. Be careful, though: don't bend any pins. Turn off your computer and open the case, then plug in the disk drive the way you saw it before. Close the case.
When you turn your computer on, Ubuntu will automatically recognize the drive, but it's not formatted correctly, so you'll have to do that. Go to Places > Computer, and double-click to check that it's the right one. It shouldn't be readable and Ubuntu should give you an error message. Right click on the drive and choose "Format." If that doesn't work for some reason, you can use System > Administration > Disk Utility to do it: choose "Format drive" in the top part and "Format volume" in the bottom part.
When you're finished, the drive should show up in Places > Computer and you can open it, then copy all your files to it. It may take hours to copy. You have a lot of stuff. When that's finished, click the little eject symbol next to the drive in the file manager, shut down, and disconnect the drive. You don't have to pull out the drive.
Get rid of strange application preferences.
I don't want the newer desktop application versions to get confused by old configurations, so you need to delete them. Since you're an old DOS gal, I know you love the terminal. Open one up and type the following exactlygconftool --recursive-unset /The first, long dash is actually two dashes.
Download Ubuntu 10.04 and write it to a blank CD or USB key
Go to Ubuntu.com and click the "Download Ubuntu" button. On the new page, under "Begin Download," click on "Alternative Download Options." The "Other Download Otions" column has a "BitTorrent Download" link. Click that. On the next page, choose ubuntu-10.04-desktop-amd64.iso.torrent. I put the direct link here, too for you. Your BitTorrent client should download the CD in an hour or so.You can either write the image to a CD or use a USB key. I think the USB key is easier. You have the 2GB one, right? Put that in the computer and wait for it to register. Go to System > Administration > Startup Disk Creator. Choose the CD image and you USB drive (it'll probably be /dev/sdb1). You might need to erase the drive. Next, click "Make Startup Disk" and wait until the program finishes. While it's doing its work, you can shut down all your other programs. When the program is finished, reboot.
If the USB key doesn't work or you don't have one, you can write the CD iso file onto a CD. Put a blank one in the drive (I have blank ones in with the rest of the computer stuff), cancel anything the computer wants to do, find the CD image, right-click on the file, and choose "Write to CD." When it's finished, simply reboot.

During the boot screen, you need to press a button to enter the boot menu. The screen should tell you what button that is. It's normally F8 or F12. Choose your USB key in the menu and hit Enter.
Install Ubuntu 10.04 without writing over your personal files (be really careful here!)
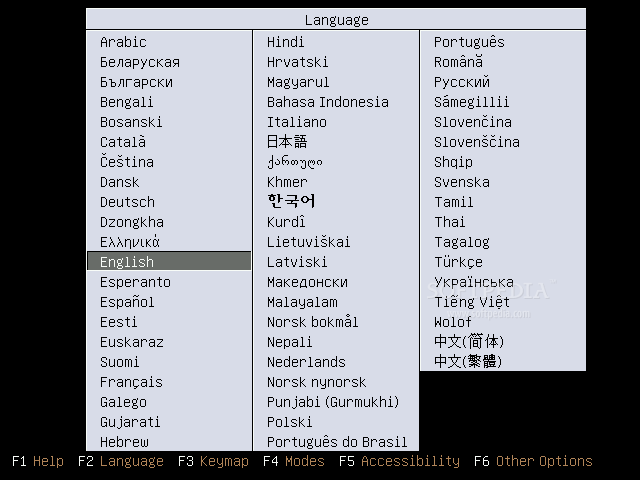
At Ubuntu's boot menu, you can choose either English or Thai, and choose to "try Ubuntu." You should boot into a full desktop. Double-click the install icon and start the installation process. Everything is pretty straightforward. I don't think you'll need any help, but if you do, here are the installation instructions.

Don't erase your drive! On the "Prepare disk space" page, choose "Manual," then choose your hard disk. This is where the directions get kind of complicated. There are two possible setups for your hard drive. I don't remember which one was used.
- The first an most probable setup is that I used a separate paartition on the disk for your /home. I like to do that. When you look at the disk partitions in the Ubuntu installer, there will be one (/dev/sda1) that is around 20-30GB and another (probably /dev/sda2) that is 200+GB. If that is your situation, Click on the 20-30GB partition, select to edit it, choose to format the partition, and choose "/" as the mount point. Click "OK.' Next, choose the 200+GB partition, click to edit, make sure that "Format" is unchecked, and choose "/home" as the mount point. Click "OK." When you are finished, click "Forward."
- The second, less likely possibility is that there is one, big partition of around 230GB. In that case, choose the partition, lick to edit, make sure that "Format" is unchecked, and choose "/" as the mount point. Click "OK." The installer will warn you about deleting some folders. Don't worry.
Install Ubuntu Tweak to help you with getting all your old applications back

In your new system (with your old files), open Firefox. Go to the Ubuntu-Tweak.com website and click "Download Now!" Follow the instructions to install the application. Run the application from Applications > System Tools > Ubuntu Tweak. In the left panel of the application, there will be an entry called "Source Center." Click on it, then click the "Unlock" button. Put in your password. Don't worry about the warnings about third-party software in this case.
Choose the following by clicking on the check box.
- Adobe Flash PPA
- Chromium Browser Daily Builds
- Docky, Elementary Desktop PPA
- GNOME Global Menu PPA
- Medibuntu
- Nautilus Elementary PPA
- Skype
- Ubuntu Tweak Stable
- Ubuntu Wine Team PPA

Sometime during this, Ubuntu should have told you that new drivers were available to you and put a little computer card up next to the clock. Click on it and install the recommended NVidia driver. Now, you'll need to reboot.
When you restart, you can
- Start Docky (Appllications > Accessories > Docky),
- Remove the bottom panel,
- Remove the top menu (right click on the menu and click "Remove from panel")
- Add the menu button to the top panel (Right click on the panel and choose "Add to panel," then choose "Main menu.")
- Add the Global Menu to the top panel using a similar method as above.
![Reblog this post [with Zemanta]](http://img.zemanta.com/reblog_e.png?x-id=dadc725a-e2d8-4803-9022-654743e8525e)
I will have to give this a try. My "upgrade" has now left me with something that won't start up anymore. Joy!
ReplyDeleteHuh. Mine went without a hitch, and I was running a frankenbuntu kubuntu/ubuntu mix. KDM to login, Gnome after login.
ReplyDelete