
Wednesday, June 27, 2007
Why I Increasingly Like Google Docs
When I first started using Google Docs, things were a little iffy. There were lots of problems, especially related to the HTML input: I still routinely jump into the HTML mode to correct some formatting issue that's bugging me, like a div or span that won't close. I stayed on, though, because I'm using Ubuntu Linux and OpenOffice.org is just too damn slow for my tastes. That's right! You heard me. The local app is much slower than a web app. OO.o guys, start code cleanup on that mess you're brewing, please. The features are killer, but the speed is a killer.
 Anyway, I'll be doing a bit on Docs main points later, as a part in my series on Ubuntu apps. Hehe. That's cute. No, I won't be doing OO.o.
Sunday, June 24, 2007
Review of the Sorell DN10 PMP / DMB / GPS

Friday night I was walking through a department store downtown, looking at mp3 players like I usually do these days (getting my two friends' iRiver Clix working on Ubuntu piqued my interest). There in the middle of the pack was something different. More of a PMP than an mp3 player, it had a large LCD screen and claimed 1GB of flash RAM for under US$100. The SD card slot in the side promised perfect Linux compatibility, but I was still dubious.
I don't make these decisions lightly, so it took me about thirty minutes of fiddling around before I bought it. The specs are as follows:
- 3.5" LCD color touch screen
- 1 GB Flash (as USB mass media)
- SD card slot for expansion
- Audio player which supports .ogg in addition to other formats
- Video player which supports 640x400 XVid at least
- Image viewer supporting all major formats
- E-book viewer
- DMB radio and TV receiver
- GPS map system
- Battery pack
After adding the necessary .is_audio_player file , I am able to use Rhythmbox to drag music from my DAAP server to the music player. Rhythmbox will also play music directly from the DN10.
The music and video interfaces are not the best in the world, but there are a large number of acceptable formats. The music player doesn't keep an artist database or anything, but does support playlists and favorites. The 1GB of flash won't store many movies, but with up to 2 GB of SD expansion, you can have 2-3.
For under US$100, this purchase was definitely worth it.
Friday, June 22, 2007
Playing Music in Ubuntu 7.04
Rhythmbox, the Ubuntu Music Player
Although double-clicking on media files opens Totem, the Ubuntu media player, your best bet for really listening and organizing a music collection is Rhythmbox. People have told me that Rhythmbox looks a lot like iTunes, and I guess I agree based on this screenshot from Softpedia.
Start Rhythmbox at Applications ->; Sound and Video ->; Rhythmbox Music Player.
What File Formats Can Rhythmbox Play?
If you completed these instructions in Playing Movies in Ubuntu then you can skip this section.Rhythmbox can play any format which GStreamer recognizes. Unfortunately, GStreamer recognizes very few formats in its default configuration. Just like in WindowsXP, you need to install many codecs in order to play the hundreds of forms of multimedia that exist. I'll tell you how to do that in a few seconds. First, a little aside.
Why doesn't Rhythmbox play MP3 files by default?Codecs are a tricky thing. Many codecs are free to download but must be paid for in order to distribute them. Since Ubuntu is a free piece of software and gives me the right to distribute it to other for free or at any price I choose, it can't legally distribute many codecs, and they must be downloaded after installation. Some codecs, such as Windows Media Player audio and video codecs, require a license of Microsoft Windows in order to install them. Some things, like the CSS codes for encrypted DVDs, are illegal to have in the U.S. Most of the codecs you'll need are available for download from the unsupported side of Ubuntu, but a couple actually require you to download from outside areas which respect the DMCA and similar laws. You decide how far you want to go to play media files. |
Adding Software Sources
In order to make the download and install process as easy as possible, we need to make sure that the Ubuntu system knows where to get the codecs from. These locations are called repositories, and we'll add them using the Software Sources application. Click on System -> Administration -> Software Sources, input your password, and you should get a dialog which looks like the one below.deb http://medibuntu.sos-sts.com/repo/ feisty free non-free
Make sure all the applications which have GStreamer and plugin in the title are checked. Click "OK" to install the missing codecs.Click "Add Source," and you'll be prompted to update your list of installable packages. Close the window and go to Applications -> Add/Remove. Type "gstreamer" into the search box, make sure that the right-hand pull-down menu says "All available applications," and you should see a list like the following.

Importing Your Music Library
When you first start Rhythmbox, it will ask you for the location of your music collection, which it will index for you. The metadata tags in the files will be parsed by genre, artist, album, title, and track number. If you already skipped that step or want to change your location, you can do that at Edit -> Preferences. The main tab (pictured above) allows you to choose where the program looks for your music and where new music is stored. You should check "Watch my library ..." just to be safe. Turn it off if you notice strange behavior from the player. You can also choose the library structure, which will help the program guess at program data if none exists.
Playing Your Music
At the top of the music player, just under the menu system, is an intuitive set of controls for playing. Use the Genre, Artist, and Album selection boxes to limit the view of your music library. Clicking play will start the selected song, the first song if none are selected, or a random song if none are selected and Shuffle is on. The next song will be one of those in the current view unless there is a play queue. Add songs to the play queue by right clicking on a song and choosing "Add to Play Queue."
There is no stop or pause button. Stop or pause a track by clicking on the Play button.
Getting and Playing Podcasts
Rhythmbox has the ability to keep a podcast library for you. Once you find a podcast you like, right click on the Podcasts line in the Source pane of the Rhythmbox player and click "New Podcast Feed." Copy the feed URL and paste it into the New Feed text box. Rhythmbox will automatically look for the latest podcasts and download them in the background for you to play at your convenience. Set up where Rhythmbox saves the podcasts and how often it checks for updates using the Edit -> Preferences dialog.
What is a Podcast?The word podcast was made popular by the iPod, which allows you to automatically download new audio blogs from sources that you find interesting. The term has widened to include any audio blog recording. Most of the time, these recordings come in the form of MP3s. You can find podcasts at Podcast.net. |
Playing Internet Radio
You can listen to radio streamed from radio stations across the world. Whether you're interested in news, weather, or music, there are plenty to choose from. Find a radio station at Wikipedia, copy the stream URL, right click on "Radio Stations" in your Rhythmbox Music Player, click "New Internet Radio Station," then paste the stream URL into the text box and click enter. The radio station will appear in your list of stations. Modify the name and genre by right clicking on the radio station and choosing Properties. Click play and listen to your selected station. It's that easy.What is Internet Radio?Wikipedia states:Internet radio (aka e-Radio) is an audio broadcasting service transmitted via the Internet. Broadcasting on the Internet is usually referred to as webcasting since it is not transmitted broadly through wireless means but is delivered over the World Wide Web. The term "e-Radio" suggests a streaming media that presents listeners with a continuous stream of audio to which they have no control much like traditional broadcast media. It is not synonymous with podcasting which involves downloading and therefore copyright issues. Nor does e-Radio suggest "on-demand" file serving. Many Internet "radio stations" are associated with a corresponding traditional "terrestrial" radio station or radio network. Internet-only radio stations are usually independent of such associations. |
Extending Rhythbox with Plugins
Magnatune Music Store
Magnatune Store offers iTunes-style song previews and paid downloads. They have quality independent artists. You are allowed to listen to all streamed music for free in a try-before-you-buy arrangement. If you like an artist enough to want top-quality versions of the music, you can purchase an album for US$8 by right-clicking on a song in the album, chosing your format, and handing over your credit card information. I suggest downloading in FLAC format because it is lossless, so you get the best possible quality when you convert to other formats.Last.fm Music Recommendation System
Last.fm is a radio station and more. It helps people out by figuring out your musical tastes (based on what you listen to) and recommending new music to you. From the Last.fm website:Scrobbling a song means that when you listen to it, the name of the song is sent to Last.fm and added to your music profile.
Once you've signed up and downloaded Last.fm, you can scrobble songs you listen to on your computer or iPod automatically. Start scrobbling yourself, and see what artists you really listen to the most. Songs you listen to will also appear on your Last.fm profile page for others to see.
Millions of songs are scrobbled every day. This data helps Last.fm to organise and recommend music to people; we use it to create personalised radio stations, and a lot more besides.
DAAP Music Sharing
If you have ever used iTunes and an iPod on a network, you know that you can listen to other people's music. It's discovered automatically for you. The method by which it is shared is called DAAP, and this plugin allows you to share your music with other iTunes and iPod users. As a side benefit, you also share your music with other DAAP-aware music players, of which there are many on Linux. Go ahead. Share. Your mother and your kindergarten teacher told you to.Any shared music available on your network will appear in the left-hand pane of Rhythmbox.
Portable Players - iPod
If you have an iPod and would like to play music from it, use this plugin. Many other portables operate as a USB mass storage device and will be automatically recognized if there is a file called .is_audio_player in the portable. Either kind of device will appear in the left-hand pane of Rhythmbox.Song Lyrics
Rhythmbox can automatically retrieve song lyrics based on the song's name and artist, if known. For those of us that like to spend our time alone, singing to ourselves, this is a blessing. Check the box to enable the plugin, then start playing a song. When you want to look up lyrics, go to View -> Song Lyrics and voila, it will most likely appear. There are some odd times when the data isn't clear enough to retrieve lyrics, but it works amazingly well.Jamendo Music Store
Jamendo is less picky about the music it puts on line. The quality of material isn't as high as on Magnatune, but the classical is pretty good. A lot of it is French, and most of it is in a foreign language. The upside is that downloads of albums are completely free. If you find something you like, just right click on the song and choose Download Album. Your bittorrent client will start, and you should have the album in five to ten minutes. Leave the client open for as long as possible to help share the load. If your portable player supports OGG Vorbis (or you don't have a player), download in OGG Vorbis format, since the songs are encoded at 300 bps as opposed to the MP3's 200 bps, and OGG sounds better than MP3 even at the same bitrate.Visualization
If you want the option to see pretty squigglies on the screen while you listen, check the visualization plugin. Start your hypno-trance by clicking Control -> Visualization.LIRC Remote Control
If your computer is set up to receive remote control signals, you should enable this plugin so that Rhythmbox starts looking for the remote signals.Cover Art
Rhythmbox can automatically search the Internet for cover art of the album you're currently playing. Similar in limitation to the Music Lyric plugin, it depends on accurate data about the song and artist. It does pretty well, but you'll get a dud once in a while. The art appears in the lower left corner of the player, which is generally wasted space anyway, so why not use it?Monday, June 18, 2007
Playing Movies In Ubuntu 7.04
Totem, the Ubuntu Movie Player
The default movie player under Ubuntu 7.04 is Totem. It can be found in Applications -> Sound and Video -> Movie Player, though you'll probably rarely start it from there. Most likely, you'll just double click on a multimedia file and Totem will open on its own.
Technical SpecificationsTotem is actually just a simple front end to the large multimedia framework used by Gnome and Ubuntu, called GStreamer. Totem does very little except send commands on to the GStreamer framework. The framework then uses a series of plugins, similar to drivers, to decide what to do with the multimedia file. Other programs which use the GStreamer framework include Rythmbox, the default music player for Ubuntu, Sound Juicer, the default CD ripper, and Nautilus, the file explorer, which uses GStreamer when previewing audio files. |
What File Formats (Codecs) can Totem Play?
Totem can play any format which GStreamer recognizes. Unfortunately, GStreamer recognizes very few formats in its default configuration. Just like in WindowsXP, you need to install many codecs in order to play the hundreds of forms of multimedia that exist. I'll tell you how to do that in a few seconds. First, a little aside. Why doesn't Totem play MP3 files by default?Codecs are a tricky thing. Many codecs are free to download but must be paid for in order to distribute them. Since Ubuntu is a free piece of software and gives me the right to distribute it to other for free or at any price I choose, it can't legally distribute many codecs, and they must be downloaded after installation. Some codecs, such as Windows Media Player audio and video codecs, require a license of Microsoft Windows in order to install them. Some things, like the CSS codes for encrypted DVDs, are illegal to have in the U.S. Most of the codecs you'll need are available for download from the unsupported side of Ubuntu, but a couple actually require you to download from outside areas which respect the DMCA and similar laws. You decide how far you want to go to play media files. |
Adding Software Sources
In order to make the download and install process as easy as possible, we need to make sure that the Ubuntu system knows where to get the codecs from. These locations are called repositories, and we'll add them using the Software Sources application. Click on System -> Administration -> Software Sources, input your password, and you should get a dialog which looks like the one below.deb http://medibuntu.sos-sts.com/repo/ feisty free non-free
Make sure all the applications which have GStreamer and plugin in the title are checked. Click "OK" to install the missing codecs.Click "Add Source," and you'll be prompted to update your list of installable packages.
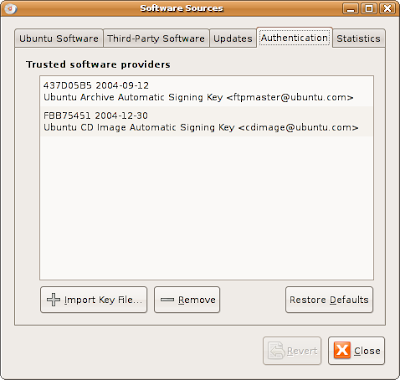
Next, you'll need to tell your system that packages from medibuntu are OK to use. Right click on this link
Click on "Save link as ..." Save the file somewhere (your desktop is fine). Next, click on the "Authentication" tab in the Software Sources window. Click on the "Import Key File" button and and select the medibuntu-key.gpg file which you just downloaded.
Close the window and go to Applications > Add/Remove. Type "gstreamer" into the search box, make sure that the right-hand pull-down menu says "All available applications," and you should see a list like the following.
Next, you'll need to tell your system that packages from medibuntu are OK to use. Right click on this link
Click on "Save link as ..." Save the file somewhere (your desktop is fine). Next, click on the "Authentication" tab in the Software Sources window. Click on the "Import Key File" button and and select the medibuntu-key.gpg file which you just downloaded.

Close the window and go to Applications > Add/Remove. Type "gstreamer" into the search box, make sure that the right-hand pull-down menu says "All available applications," and you should see a list like the following.
Playing Media
When you have a file you want to play. simply double clicking on it should open Totem. If you want to play multiple files in a row, drag the files from the desktop or a file explorer into the playlist sidepane of Totem. Files will be played in the order in which they appear. If you want to change the order of play, either drag and drop the file to its new location or choose the file to be moved, then move it using the up and down arrows. If you want to shuffle or repeat the playlist, those functions are located under the Edit menu.Audio files will automatically have a visualization of the audio. Video files will play the video at the resolution it was recorded at. To increase the size of the window, look under the View menu. The window can be easily resized using the keyboard, though, so I suggest you use f to turn full-screen playback on and off, 0 for half-size playback, 1 for normal-size playback, and 2 to see the video at double the normal size. Use the right and left arrow keys to skip ten seconds forward or backward in the audio or video.
Although Totem is the default player to use when you double click on an audio file, I'm going to suggest that you try to use the Rhythmbox Music Player instead because of its exceptional handling of playlists and its music collection tools.
Enjoy watching videos on your new Ubuntu system.
Monday, June 11, 2007
The Panel Applets
Or, "How to make your life a little easier"
Let's look at how to add a panel applet and go through descriptions of the common applets one by one.

So to add an applet to the panel, we right click on an empty space in the panel and choose "Add to Panel." Not complicated or difficult. We will be presented with a dialog which lists the installed applets in various categories. Although the list is already pretty long, more can be installed by searching for "gnome applet" in Add/Remove.
 Below is a list of applets which I think might interest you:
Panel applets are great little additions to your desktop. They can make many jobs as simple as glancing to your panel. Find a few that you like.
What is an Applet?
If you look at the Ubuntu menu, you'll notice that programs are called applications. Given that hint, you can probably guess that an applet is just a very small application. Panel applets are small, single-purpose programs which sit in your panel. They may be used to monitor some aspect of your computer, give you information about other computers on the network, or just indicate the weather in your area. Sometimes applets give you an easy-to-access interface for a common program like a dictionary, search, notes, blogger or calculator. In these cases, clicking on the panel applet pulls down a small version of the larger program. Clicking again hides the program.Let's look at how to add a panel applet and go through descriptions of the common applets one by one.
How to Add an Applet to the Panel
The Ubuntu desktop, based on the Gnome (pronounced Ga-nome) Dektop Project, is amazingly predictable and consistent. The Gnome developers went through a lot of usability testing with average people and came up with the Human Interface Guidelines (HIG). All applications officially in the Gnome Desktop must adhere to the HIG standards. Why am I telling you this? It is because right-clicking to bring up a context menu is in the HIG, and the panel supports this because it is part of the Gnome Desktop. If we want to change or view the properties of something, we can consistently right-click to get what we want, and that is no different with the panel.So to add an applet to the panel, we right click on an empty space in the panel and choose "Add to Panel." Not complicated or difficult. We will be presented with a dialog which lists the installed applets in various categories. Although the list is already pretty long, more can be installed by searching for "gnome applet" in Add/Remove.
Accessories
- Address Book Search: If you use Evolution as your main personal information manager, this applet will search through your contacts and allow you to e-mail them just as if you were using Evolution itself.
- Clock: This is already present in the top-right corner of your screen. The look and format can be changed by ... right clicking on the applet.
- Deskbar: To me, this is the big daddy of all applets you'll want to use. It can search virtually anything from your desktop. People tell me that it's similar to Google Desktop Search on WinXP and Finder on OSX, but I don't really know. This is a list of some of the things it can do for you:
- Web Searches: If you use the Epiphany Web Browser (the Gnome Desktop Application) instead of the standard Ubuntu Firefox, you can use the Deskbar to search under every quicksearch. I have Wikipedia, Google, Flikr, and many others.
- History: Previous searches matching the phrase jump right to the top.
- Programs: Launch a program by name instead of going to the menu.
- Web: Type or paste a web or e-mail address and go directly their.
- Files, Folders, and Places: Search for places which include the search phrase.
- Dictionary: Look up words using the dictionary program.
- Yahoo! Search: Get the top 10 results from Yahoo on the phrase.
- Beagle: You can search inside your files instead of just by name. Want find that chat you had with Joe in March? It's a lot easier this way. Results open in a new window.
- Web Bookmarks: If you use Epiphany Web Browser, your bookmarks will be searched for the phrase.
- Web History: Go to a recent web page by typing part of its address or name.
- Beagle Live: Similar to Beagle, above, but results are presented in the same search column as everything else.
- Computer Actions: Type "shutdown" to shutdown, for example.
- del.icio.us Bookmarks: If you are part of the social bookmarking site http://del.icio.us, you can retrive your bookmarks from there.
- Shortcuts and more are available by choosing "More" inside the Preferences window.
- Dictionary Look up: This used to be one of my favorites, but is not of much use since Deskbar came along. The only superior aspect is that the dictionary pulls down from the panel instead of being a separate window.
- Fish: Want to raise goldfish but don't want the mess? This is your chance. Goldfish right in your panel!
- Geyes: Eyes eerily follow your mouse pointer around the desktop. While this applet initially looks just as silly as Goldfish, it can be extremely useful if you are the kind of person who loses your mouse a lot. Maybe consider longer mouse trails, too.
- Invest: If you have stocks that you want to follow, throw some of the symbols in here and have quick access.
- Sticky Notes: These are notes that work like Post-Its (r). I don't use them anymore now that I have Tomboy (below).
- Tomboy Notes: Wiki notes. These are the hottest thing I've ever seen for keeping notes for my book or an article. Today's note also helps you keep track of wasted time. To-dos or virtually anything else you want to record are possible with these bad boys.
- Weather Report: Weather reports in easy reach. The listed city closest to Masan is Busan/Kimhae. Close enough for gov't work.
Desktop and Windows
- Drawer: Not enough panel space for all your applets? Add a drawer to put them in. Geez. I hope you never need this one.
- Force Quit: Although applications (especially the Gnome ones) are well-behaved, you may sometimes hit an error and have an application hang up on you. These are almost always proprietary programs from outside Ubuntu. Don't worry. It won't take down the whole system. If you have the misfortune to actually need to work with one of these programs on a regular basis, you can install the "Force Quit" applet to kill off the offending application. Just click on the applet then click on the window you want to kill off.
- Lock Screen: If you leave your computer on and logged in while you are away, consider locking the screen. This function is also available on the log out screen.
- Quit: This brings up the log out screen which gives you the option to lock the screen, log out, shut down, or restart. If you change your preferences, you can also suspend or hibernate your laptop here. This applet is already in the top right corner of your screen.
- Show Desktop: I never need this. It's already in the bottom-left corner of your screen.
- Trash: I tend to delete files using Shift-Delete, erasing them immediately. If you use the Delete key or "Move to Trash" on the file, they will end up in your Trash (think of the Recycle Bin in WinXP). Empty it when you need disk space.
- Window List: The taskbar at the bottom of your screen is really this applet.
- Window Selector: If you don't like all the space taken up by the Window List Applet, get rid of it and use this instead. It gives you a pull-down (or pop-up) menu list of all open windows.
- Workspace Switcher: This is already in the lower-right corner of your screen. The number of workspaces is adjustable (right click, of course). When one workspace gets cluttered with too many windows, move them to new spaces and open new applications in the new space. I generally have four workspaces and keep my applications on them like this:
- Workspace 1: Web browser windows
- Workspace 2: E-mail and Chats
- Workspace 3: Documents or web pages that I'm writing
- Workspace 4: Documentation and notes related to the writing.
Internet
- Contact: If you install Telepathy (search Add/Remove), you can have all your MSN, GTalk, and Jabber contacts available for text and voice chat from the panel. This is kind of new and not 100% stable yet. Consider it early beta software, which is the reason it's not installed by default.
- Contact Group: If you want to talk to entire groups at once (like a conference call, I guess) use this applet. Same caveats as the Contact applet.
- Contacts Overview:
- Peekaboo: another instant messaging applet. This one is not as integrated as the ones above and uses the Peekaboo program to communicate.
- Zeroconf Service Discovery: When I'm at home, all the services are easy to find: printers, web pages on my server, VOIP clients, whatever. This is really only useful if you carry your laptop around to new networks all the time, like I do.
System and Hardware
- Battery Charge Monitor: Monitor your Laptop battery. You already have a limited form of this in the notification area.
- Brightness Applet: Lower the brightness of your laptop screen. It may or may not work depending on your laptop's hardware.
- CPU Frequency Scaling Monitor: If your CPU supports scaling back to save power, you can monitor it here.
- Inhibit Applet: You may now want to go into power-saving mode while you are watching a movie or even when plugged in to AC power. Turn power saving on and off here.
- Modem Monitor: Will you ever use your modem again?
- Network Monitor: If you want to watch the traffic going in and out of your network card, use this. Yes, I use it, and yes, I'm a geek. I don't see how it could interest you.
- System Monitor: Look after your CPU and memory usage. Click on this applet to open a task monitor similar to the one you get when you press CTRL-ALT-DEL in WinXP.
- Terminal Serve Client Applet: If you need to connect to a terminal server often, use this applet. What? Yeah. Don't worry about it.
- Volume Control: This is already on your panel in the top-right corner.
Utilities
- Character Palette: If you find that you often need non-standard characters like ñ or ©, then use this applet.
- Connect to Server: Unless you are a computer consultant who is traveling and changing networks all the time, don't worry about this.
- Keyboard Accessibility Status
- Keyboard Indicator: If you have multiple languages in your system and switch between them, you can easily get confused. Use this applet to remember what language you are currently typing in.
- Main Menu: This is a Start style menu. As in Windows 95. One menu to rule them all.
- Menu Bar: This is the Ubuntu menu. There are three sections divided by function. This type of menu has a better usability than the "One Menu" system, but some people prefer what they know.
- Notification Area: This is already located next to the clock. If you have updates, they'll appear here. If an application wants to keep itself available to you after close, it'll be here, as well.
- Pilot Applet: Do you have a Palm Pilot? I didn't think so. If you did, you'd use this applet.
- Run Application: If you like to type your commands in (like I do) instead of clicking around, this will bring up a command entry dialog. Alt-F2 does the same thing, so I would never use this applet.
- Search for Files: This is and old-fashioned, search-by-name applet. It's not of much use now that full-text search has arrived.
- Separator: This applet offers no functionality other than being aesthetic pleasing. If you have a bunch of applets, group them with the separator.
Panel applets are great little additions to your desktop. They can make many jobs as simple as glancing to your panel. Find a few that you like.
Singing the ATI 9100 IGP Blues
Well, I've got a second friend who has Ubuntu 7.04 on his laptop now. Everything was beautiful until he asked me to enable TV out. After hours of searching for a method, I found out that the 9100 and 9200 occupy a no man's land in driver country: The open drivers support them well, but don't do TV out, the new proprietary don't support the chipset anymore, the older proprietary drivers support it but only in limited 2D capacity -- no 3D and no TV out, and the patch to the Open Source drivers which someone created from the Gatos project is out of date and no longer builds. I worked for hours on getting the Gatos patch to work. Ugh!
I don't know what to tell my friend. I'm sure someone could get the Gatos patch updated, but my limited scripting skill don't transfer well to video driver programming in C. I think he may never get the TV out to work, in which case he'll be headed back to WinXP.
I don't know what to tell my friend. I'm sure someone could get the Gatos patch updated, but my limited scripting skill don't transfer well to video driver programming in C. I think he may never get the TV out to work, in which case he'll be headed back to WinXP.
Subscribe to:
Posts (Atom)